 I love it when we get guest posts! I really am loving this guest post because it's crafty and the holidays really get my crafty juices flowing! Check out these crafty ideas from Pearce Corbin.
 When seeking a creative way to decorate for the holidays, adding homemade lanterns can instantly transform your homes into a magical place with the ambiance created. Try these three methods for creating your own DIY holiday lanterns.
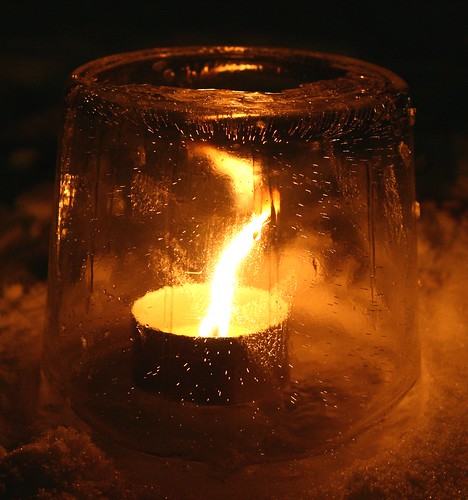
Light in the Dark: Creating an Ice Lantern
Ice lanterns are a beautiful selection for the winter and are incredibly easy to create.
To create this project you will need:
• Empty two liter soda bottles
• 24 ounce plastic water bottles
• Water
• Freezer/ Freezing outdoor temperature
• Decorative greens
Gather enough soda and water bottles per lantern you wish to create. Begin by cutting the tops off the plastic containers. Next, fill the bottom of the two liter container with two inches of water and allow to freeze. Once frozen, nest the 24 ounce water bottle inside and center it on the ice. Once centered, fill the middle container with weights such as stones or tape securely to the liter bottle. Gather decorative materials such as pine boughs and cranberries and place in the sides between the two bottles. If using berries, remember that they will float, so place heavier materials over and layer accordingly. Once you are pleased with the arrangement fill in the sides with water and place in freezer. An interesting tip-if one uses boiling water before placing in freezer, the resulting ice will be transparent. Once the sides and decorations are frozen, you can proceed to removing your lantern. Remove weights or tape from center bottle. Very carefully pour boiling water into the bottle and remove. The boiling water should slightly melt the surrounding ice, thereby aiding in the removal. Next, remove the final container. Soda bottles generally have a wider base then top making it difficult to slide the lantern out, if this is the case simply cut the plastic off. Finally, place a tea light candle inside and place outdoors.
Versatile Can Lanterns
If you wish to create a longer lasting lantern, then the tin lantern is a great project.
To create tin lanterns gather the following materials:
• A tin container
• Scissors
• Paper
• Tape
• Marker
• Various sized nails
• Twine/ribbon
• Hammer
Begin by removing the original label off of the tin can by soaking in hot water. Carefully peel off the label, scrub and dry the tin can. Next measure a piece of paper to the circumference of your tin can. On this piece of paper draw a design to act as a template. Some examples include: snowflake, Christmas tree, or stars. Once your design is complete, secure it to the tin can with tape. Now use the paper as your guideline when punching holes. Be sure to place your tin sideways on a surface on which it will not slid, such as a towel or between forceps. Carefully use the hammer and nails to punch through the metal. Add two holes at the top of the tin from which you can thread your twine or ribbon for hanging. Once finished, you may also consider spray painting the tin a different color or add additional decorations. Get creative. Place a tea light candle inside and enjoy the light as it streams through your lovely design. Keep in mind that the tin will get hot so do not pick up your lantern after several hours of burning a candle.
Soft and Filtered Light: Paper Cut-out Lanterns
The third type of lantern you can create is known as a paper cut-out lantern. This type of lantern uses a similar technique as the can lantern.
To create, gather:
• White paper bags
• Hole puncher
• Stencils
• X-acto knives
Lay your paper bag flat on a cutting board and trace a design using a stencil or going freehand. Next use the hole-puncher and/or X-acto knives to cut out your design. Simply place a LED flame-free candle inside and your lantern is complete. An easy, safe, and beautiful way to create a welcoming atmosphere.
The holidays are always characterized with bright lights surrounding the Christmas tree or our homes. These easy DIY items are perfect for bringing that extra brightness to your holiday celebration.
BIO: Pearce Corbin is an interior designer in-the-making and a freelance writer for MyProjectorLamps.Com. He’s a lover of vintage furniture and has a special affinity for spooky couches.


No comments:
Post a Comment